Introduction
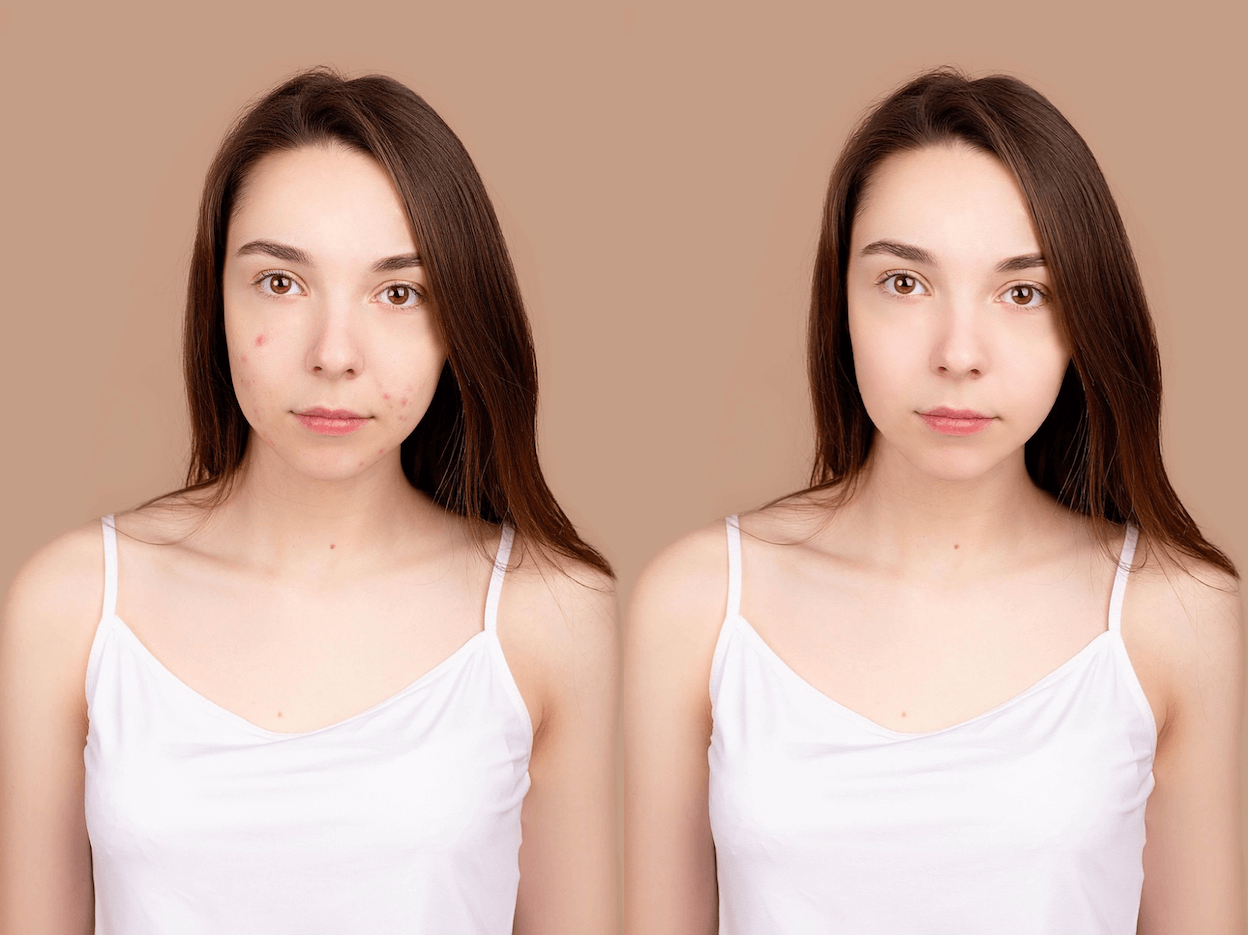
Breakouts always show up when the camera is sharpest. Traditional beauty filters smear complexions and make the before-after acne removal photo editor comparison look artificial. This guide shows you how to remove acne and pimples in photos on mobile with AI while keeping pores, freckles, and glow intact. You will walk through the Sinaï Studio workflow plus quick extras so every share-ready image is clear and confident.
Why Sinaï Studio is the fastest way to clear blemishes
Sinaï Studio was built for creators who need production-ready edits from a phone, not a desktop lab. The app combines precision AI masking with a 25-edit-per-day free plan, making it one of the best apps to remove acne from selfies without trading detail for blur. Here is why the mobile workflow outperforms one-click filters:
- Object Removal (Eraser): Tap and brush to erase individual blemishes while the AI reconstructs natural skin texture underneath.
- Refiner and Detailer: Target micro-adjustments so cheeks stay smooth but pores and makeup remain believable.
- Prompt-ready Inpainting: For clusters, describe the finish you want—“clear, soft skin with gentle highlights”—and watch the AI respect your brief.
- Mobile-first control: All tools are thumb-friendly on iPhone and Android, so you can deliver fast mobile photo retouching workflow results anywhere.
Step-by-step: remove acne & pimples with Sinaï Studio
This mobile walkthrough works on both iOS and Android. You can follow along on an AI acne remover iPhone session or the same interface on a Google Pixel—everything lives inside one app.
- Open or install Sinaï Studio. Launch the app, sign in, and tap the camera icon to import the selfie or portrait you want to clean up.
- Duplicate and zoom for control. Tap the three-dot menu and duplicate your image so you can compare progress. Pinch to zoom on problem areas before you start brushing.
- Trace blemishes with Object Removal (Eraser). Select the eraser icon, paint over each pimple or acne scar, and confirm. The AI fills in natural, clean skin on release.
- Switch to Inpainting for stubborn clusters. Mask wider breakouts, then send a prompt like “restore clear cheek with natural pores, no shine.” The model rebuilds the area without flattening tone.
- Use Refiner to smooth without plastic skin. Highlight only the edited pixels and apply Refiner with a prompt such as “soften texture, keep realistic pores.” This keeps “smooth skin without losing detail AI” true in practice.
- Balance tone with FaceBlend or adjustments. If lighting shifted, run FaceBlend to align complexion with the original subject or tweak exposure and warmth in Adjust.
- Save variations and export. Store your favorite look as a Scene for quick before-after toggles, then export in HD. The free plan covers 25 edits per day; upgrade anytime to remove the watermark for campaign use.
Prompt ideas for stubborn blemishes
- “Clear forehead skin with tactile pores, remove acne, keep highlights soft.”
- “Smooth chin breakout, natural matte texture, preserve lip detail.”
- “Even out nose redness, maintain freckles, neutral studio lighting.”
- “Teen skin with gentle glow, erase pimples, keep hairline crisp.”
Pro tips for natural-looking results
- Work in passes: Remove a few blemishes, zoom out, and review. Incremental edits keep the AI acne remover mobile workflow believable.
- Feather your masks: A 5–10% feather avoids harsh edges, especially around cheeks and jawlines.
- Mix tools strategically: Use Object Removal for isolated pimples, then Refiner or Detailer to reintroduce micro-texture.
- Check color balance: Toggle the histogram in Adjust to ensure the retouched area isn’t brighter than surrounding skin.
- Document the before-after: Export a collage or short clip to showcase the transformation—ideal for portfolio or client sign-off.
Troubleshooting the workflow
If areas look blurry: Reduce the brush size, undo, and retouch in smaller strokes so the AI has more nearby pixels to sample.
If skin tone shifts: Re-run Inpainting with a prompt that specifies the tone you need (for example, “medium-brown skin with warm highlights”).
If freckles or moles disappear: After cleaning blemishes, tap FaceBlend or the Detailer to paint them back in so the subject still looks like themselves.
Keep the retouching momentum
Once the skin is clear, polish the rest of the frame fast. You can remove distractions from a portrait with Sinaï Studio’s Object Removal guide or restore sharpness with our mobile unblur tutorial. If you want full creative control, explore how to swap backgrounds in minutes for a cohesive shoot.
Ready for flawless mobile retouching?
Sinaï Studio delivers a full blemish-removal workflow wherever you shoot—AI-driven, mobile-first, and ready for professional delivery. Download the app, test the free plan, and upgrade only when you need watermark-free exports for clients or campaigns.