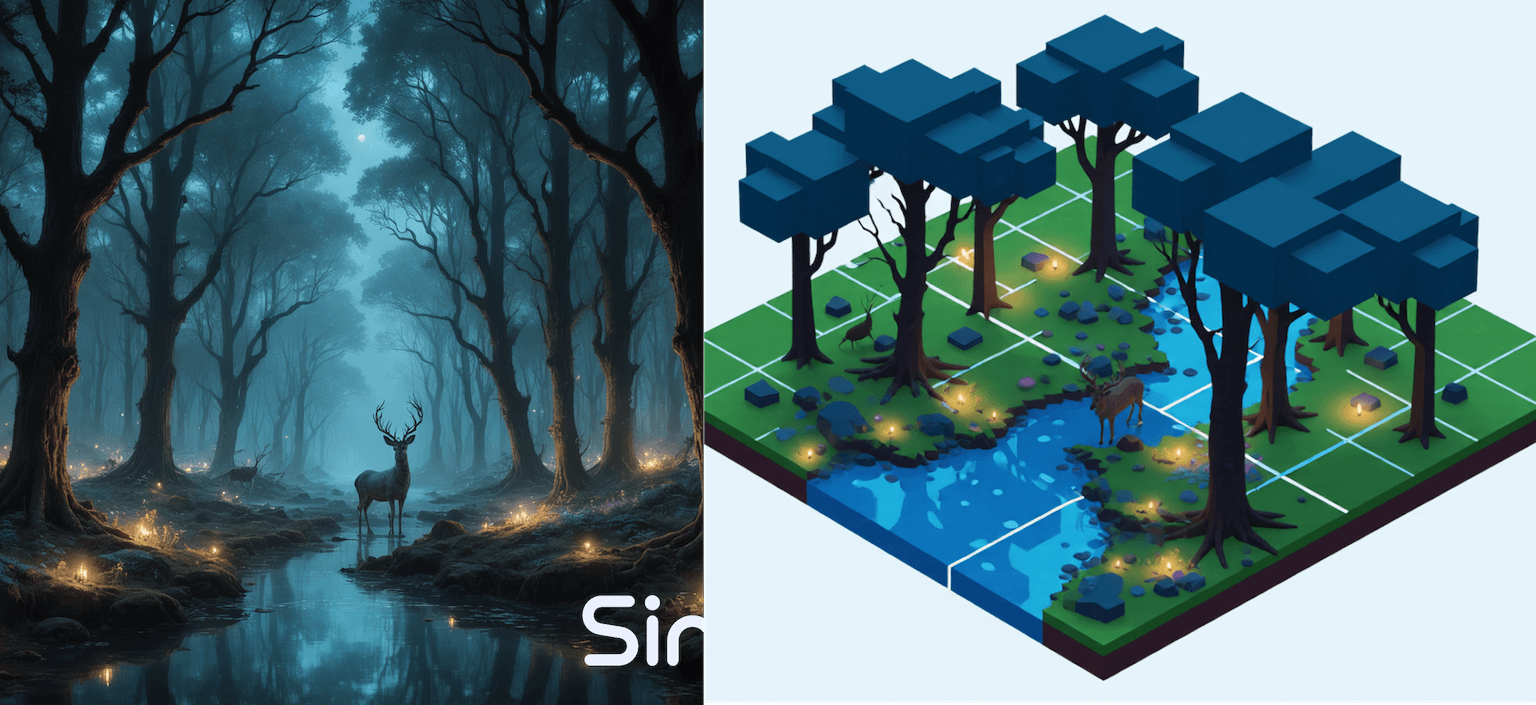
Why turn a photo into an isometric illustration?
Isometric illustrations amplify clarity for UI mockups, explainer decks, product pages, and pitch decks. Instead of drawing the scene from scratch, you can convert an existing photo into crisp isometric art, keeping perspective hints from the reference while layering stylized lighting and shading. Sinaï Studio’s mobile workflow makes this process fast on both iPhone and Android.
- Repurpose product shots into isometric hero graphics for landing pages.
- Visualize architectural concepts without rebuilding 3D models.
- Create consistent brand illustration systems with AI-controlled prompts.
Key takeaways
- Image-to-Image focus: every edit happens through the Edit → Image-to-Image button, keeping your original composition intact.
- Long-tail prompts rank: weave phrases like “turn photo into isometric illustration” and “isometric illustration generator from photo” directly into your copy and prompts for higher intent traffic.
- Mobile-native workflow: iterate from your phone with 25 free conversions per day, no desktop renderer or plug-ins required.
Prep your photo for the best isometric conversion
- Choose a clear subject. Avoid blurry references; the AI performs best when edges are defined.
- Simplify the background. Crop or remove clutter so the isometric result highlights the hero object.
- Note brand colors and textures. You’ll feed these details into your Image-to-Image prompt so the output matches your style guide.
How to turn a photo into an isometric illustration (Sinaï Studio tutorial)
This workflow relies solely on the Image-to-Image Edit button, as required for this tutorial.
- Import the photo. Open Sinaï Studio, tap the camera icon, and add your reference image from the gallery.
- Select Edit → Image-to-Image. The button sits below your canvas; tap it to start an Image-to-Image prompt.
- Describe the transformation. Write an instruction such as “Transform this product photo into a clean isometric illustration, 30° angle, pastel gradient backdrop, soft studio lighting, subtle 3D shading.”
- Dial the style intensity. Use the white settings button in the top-right corner to adjust style strength or output size if you want denser shading.
- Generate and review. Tap Send; Sinaï Studio renders a new isometric version while keeping the original safe in the project tray.
- Iterate with targeted prompts. Re-open Image-to-Image for refinements, e.g., “Add an isometric shadow on the floor” or “Switch the palette to brand blues and oranges.”
- Save the winner. Tap Save to store the illustration in your Studio for export or sharing.
Isometric prompt generator cheat sheet
Mix and match the attributes below to produce high-converting “isometric illustration generator from photo” prompts inside Sinaï Studio.
| Component | Options to copy | Example prompt snippet |
|---|---|---|
| Camera angle | 30° isometric, 45° isometric, axonometric top-down | “render at a polished 30° isometric angle” |
| Lighting | soft studio light, rim-lit neon, morning sunrise glow | “with soft studio lighting and gentle rim highlights” |
| Materials | clay render, glossy enamel, matte plastic, brushed metal | “surface treated as matte plastic with subtle specular shine” |
| Background | pastel gradient, blueprint grid, monochrome plane | “set against a pastel gradient background with slight vignette” |
| Use case CTA | UI hero, SaaS landing, architecture preview, pitch deck visual | “so it can headline a SaaS landing page hero section” |
Troubleshooting & pro tips
- Contours look wobbly? Re-run Image-to-Image with “crisp outlines” or “vector sharp edges” in the prompt.
- Need brand colors? Append hex values or color names: “apply #1B4FFF and #F6C177 as primary accents.”
- Shadows too soft? Ask for “hard isometric shadows at 45° to the right” or rerun with higher style intensity.
- Want multiple angles? Duplicate the original photo in your project and run separate Image-to-Image prompts (30°, 45°, top-down) for a full set.
Where to use your new isometric illustration
Exported files from Sinaï Studio are ready for slide decks, app store screenshots, social campaigns, and product explainers. Because the workflow is mobile-first, you can capture a photo, convert it to isometric art, and publish it without leaving your phone.
FAQ
Can I convert a photo to an isometric illustration without desktop software?
Absolutely. Sinaï Studio does the heavy lifting on mobile—just import your reference image, tap Image-to-Image Edit, and prompt the new style.
What prompt works best for isometric Image-to-Image edits?
Combine camera angle, lighting, and materials: “Transform this office photo into an isometric illustration with 45° view, warm interior lighting, and clay render shading.” Specific references guide the AI toward consistent geometry.
Does Sinaï Studio support both iOS and Android for isometric editing?
Yes. Download the app from the App Store or Google Play and start generating right away—25 free Image-to-Image conversions are included each day.
Conclusion
Turning a photo into an isometric illustration no longer requires Illustrator or complicated 3D tools. Sinaï Studio’s Image-to-Image workflow gives you a mobile isometric illustration generator with precise prompt control, brand-safe outputs, and instant iterations. Import, prompt, iterate, and export—your next hero graphic is minutes away.
