Introduction: bring cartoon characters into the real world
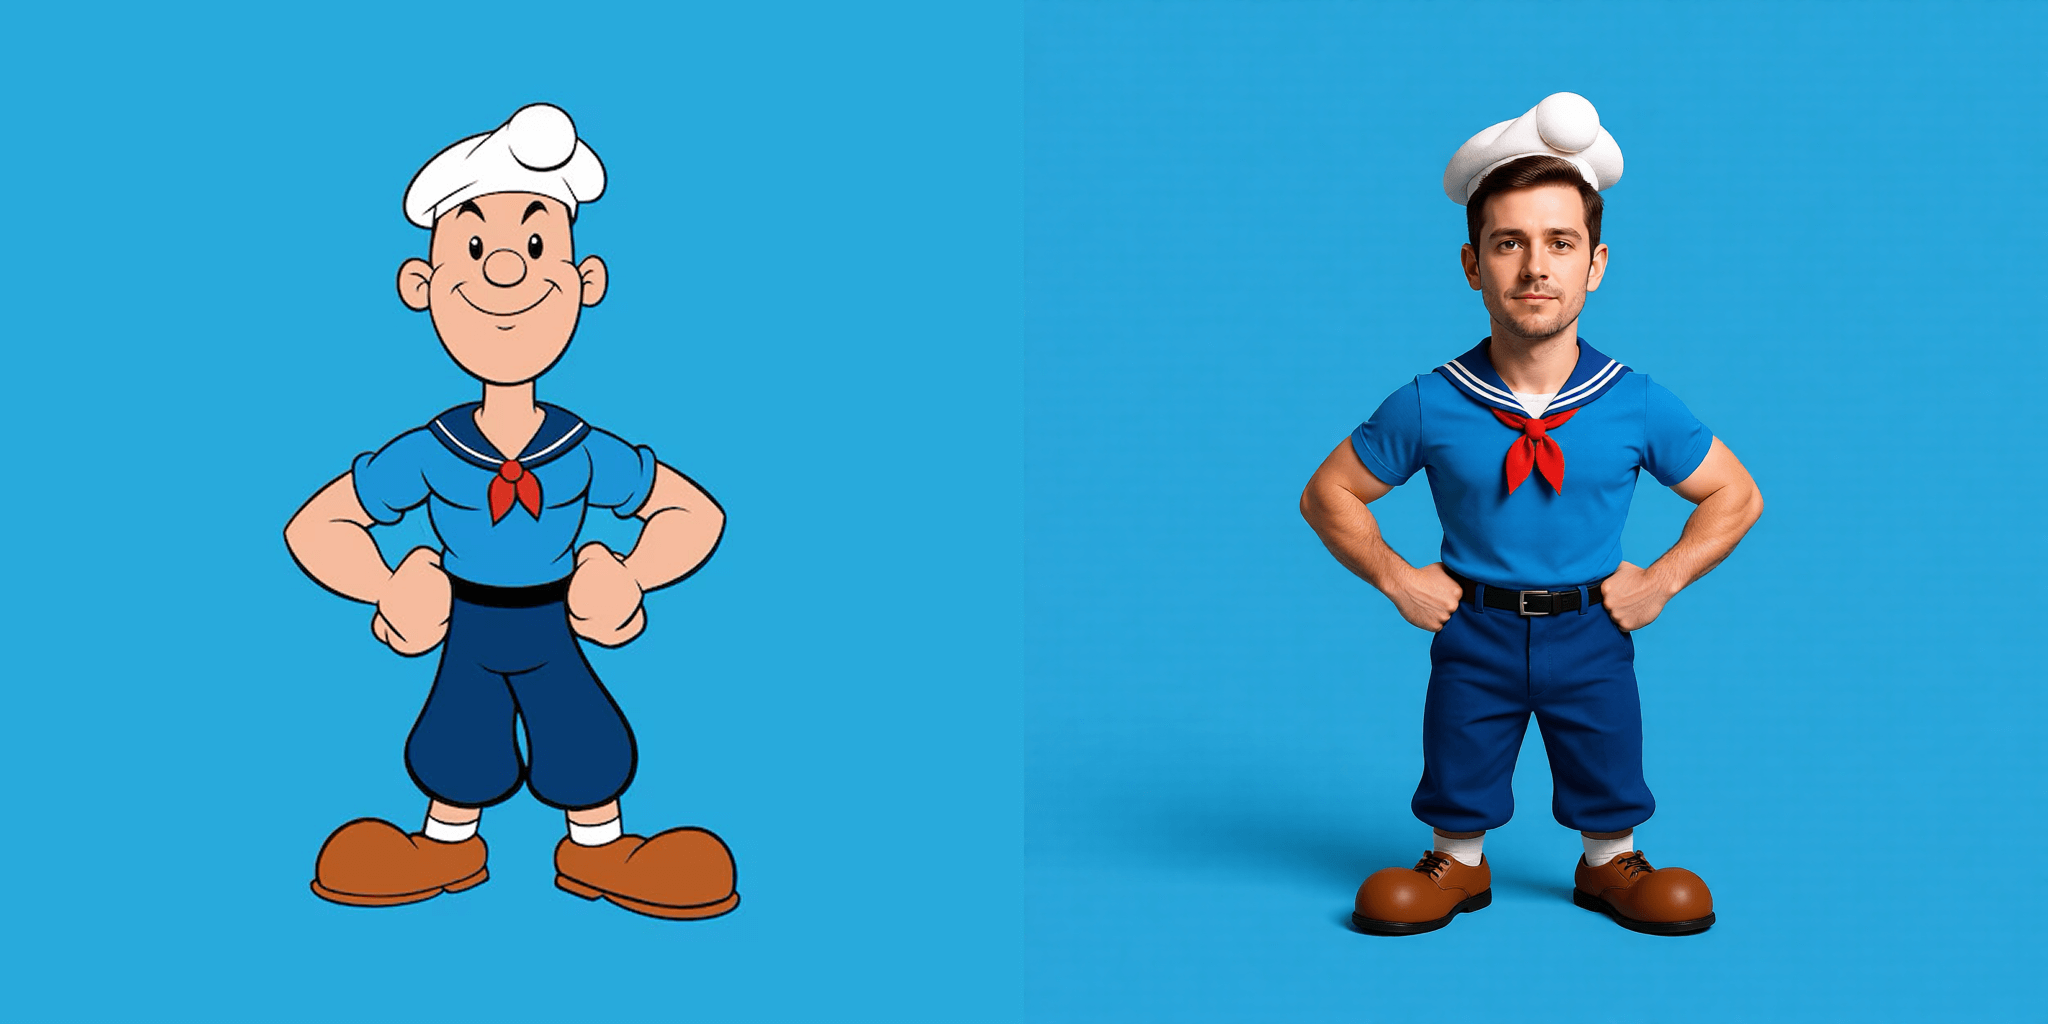
Searching how to turn a cartoon character into a realistic person? With Sinaï Studio and its Image-to-Image Edit button, you can convert stylized heroes, anime avatars, or mascots into lifelike portraits from a single mobile workflow. This AI cartoon to realistic photo app approach keeps everything on your phone, so you can iterate during meetings, shoots, or commutes without desktop software.
Key takeaways
- One-button realism: the Image-to-Image Edit button is the only tool you need to transform cartoons into believable people while staying true to the original design.
- Made for mobile pros: Sinaï Studio delivers full image-to-image editing on iOS and Android with 25 free edits per day, fast previews, and localized prompts.
- Prompt-level control: steer skin texture, wardrobe, lighting, and camera language for repeatable brand visuals or character art.
Why make your cartoon character look realistic?
Turning stylized art into believable people unlocks new storytelling and marketing angles. Realistic conversions help you test live-action adaptations, pitch characters to clients, or create viral social content that bridges animation and reality.
- Pitch decks: mock up live-action versions of animated mascots to sell campaign ideas.
- Cosplay lookbooks: give fans a realistic reference before costume builds.
- Worldbuilding: convert anime characters to real people with AI to guide casting, wardrobe, or makeup decisions.
- Social storytelling: remix beloved characters into photoreal portraits for reels, thumbnails, or editorial art.
Prep checklist before you convert
- Import a clean source: grab the highest-resolution cartoon artwork you have so facial landmarks are easy for the AI to read.
- Crop tight around the character: keep shoulders and head centered to avoid background distractions.
- Gather references: save a few photos that match the vibe you want (lighting, age, ethnicity) for prompt inspiration.
- List realism cues: note skin tone, eye color, hair texture, camera angle, and mood before you start writing prompts.
How to turn a cartoon character into a realistic person with Image-to-Image Edit
Follow these simple steps entirely inside Sinaï Studio—the workflow relies only on the Image-to-Image Edit button described in the app guide.
- Import the cartoon art. Share it from your gallery or tap the camera icon in Sinaï Studio to select the image you want to transform.
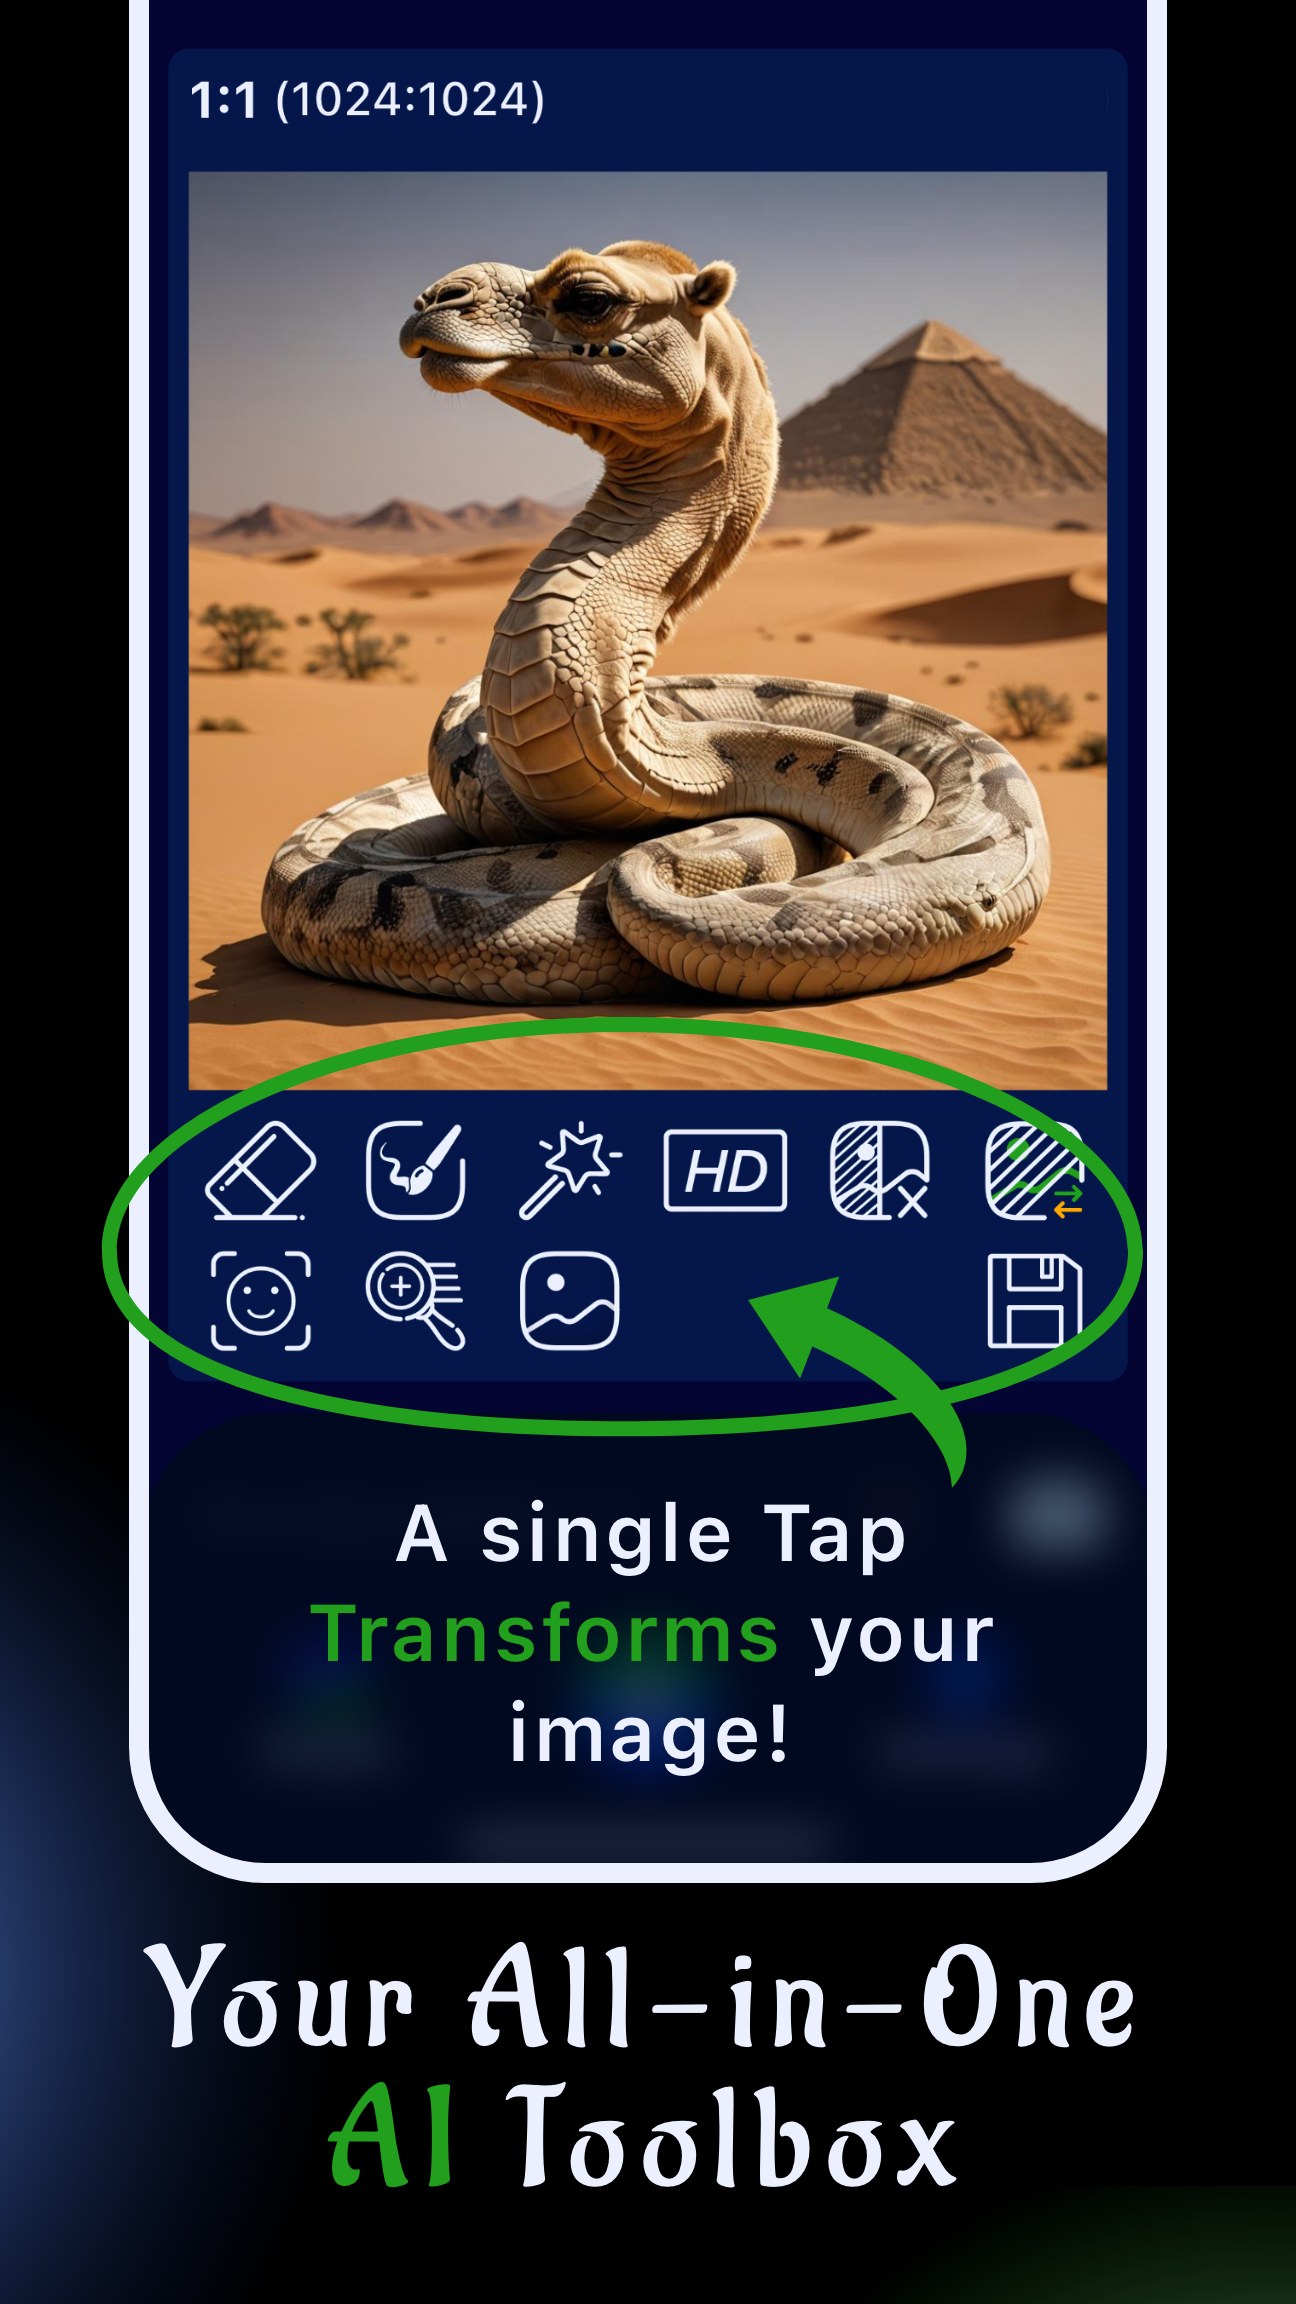
- Open the project canvas. You will see your image with the editing buttons lined up underneath.
- Tap Image-to-Image Edit. The icon shows a framed picture with an arrow—this is the dedicated image-to-image editing button that powers cartoon-to-realistic conversions.
- Write a realism-focused prompt. Mention age, skin tone, expression, hairstyle, wardrobe, lens choice, and lighting. Example: “Turn this cartoon detective into a realistic man, early 30s, olive skin, trimmed beard, navy trench coat, cinematic lighting, 85mm portrait lens.”
- Adjust style intensity. Tap the white generation settings button in the top-right corner and lower the style slider if you want to preserve proportions, or raise it for a bolder reinterpretation.
- Generate and evaluate. Press Send, review the preview, then iterate with refined prompts or different style intensity values until the face feels authentic.
- Save your favorite result. Tap the Save button to store the realistic portrait in your Studio gallery for downloads or sharing.
Tip: If a detail feels off, undo and run another Image-to-Image pass with clarifying language like “keep original hairstyle” or “add subtle freckles.”

Prompt blueprints for realistic faces
Borrow these prompt starters as you explore image-to-image editing from cartoon to realistic vibes. Swap names, outfits, and lighting cues to stay on brief for your brand or project.
| Scenario | Prompt starter |
|---|---|
| Cosplay-ready portrait | “Turn this cartoon hero into a realistic woman, late 20s, warm studio lighting, 50mm lens, natural skin texture, detailed eyes, glossy black bob haircut.” Add wardrobe notes (leather jacket, armor plates) so the AI keeps signature elements. |
| Corporate headshot makeover | “Convert this cartoon mascot into a realistic person, light brown skin, tailored charcoal blazer, neutral expression, clean background, softbox lighting, shallow depth of field.” Mention “professional portrait” or “LinkedIn-ready” for polished vibes. |
| Fantasy warrior adaptation | “Make this cartoon knight look like a real person, weathered armor, cool moonlight, cinematic rim light, scar on left eyebrow, fierce gaze.” Realistic texturing cues help metal, leather, and skin read authentically. |
| Anime to live-action close-up | “Convert this anime character to a real person, fair skin with blush, luminous eyes, soft morning light, 35mm lens, subtle film grain, pastel color grade.” Use “keep proportions” if you want to preserve iconic silhouettes. |
Advanced tips for lifelike results
- Lead with lighting: specify “golden hour,” “studio softbox,” or “neon cyberpunk” to anchor the vibe and keep skin believable.
- Mind the eyes: include phrases like “sharp eye detail” or “catchlight in both eyes” to avoid flat gazes.
- Reference real people: describe ethnicity, age range, and complexion so the AI lands on grounded features.
- Iterate in short loops: duplicate your favorite output and run another Image-to-Image pass for subtle tweaks (makeup, expression, or wardrobe).
Troubleshooting common issues
- Face drifts from the design: lower the style intensity slider and add “preserve original face shape.”
- Skin looks plastic: mention “natural pores,” “subsurface scattering,” or “matte finish” in your prompt.
- Eyes mismatch: call out “symmetrical irises” or “matching eye color” on the next pass.
- Background feels noisy: add “neutral background” or “blurred bokeh” so focus stays on the character.
Why Sinaï Studio is the go-to cartoon-to-real workflow
- Mobile-first control: the UI is designed for on-the-go creators with thumb-friendly sliders, quick undo, and localized guidance.
- End-to-end toolkit: once you nail realism, you can keep iterating with the same Image-to-Image button for different outfits or moods—no desktop suite required.
- Generous free tier: experiment with 25 daily edits before upgrading, perfect for testing multiple versions per character.
- On-brand consistency: reuse prompts, styles, and seeds to build a consistent cast across campaigns or storyboards.
Next steps
Ready to make your first live-action redesign? Download Sinaï Studio, import a cartoon you love, and run a few Image-to-Image prompts today. Your realistic character board could be finished before your next meeting.